Sure, I mean, we all have issues right. Nobody is perfect. My almost complete lack of knowledge for the proper placement of commas is proof of that and I'm an English Grad. Thanks college. Anyways, the actual issue I am referring to are the Deal a Day T-shirt sites (like this one, this one, and then this one) that my husband previously frequented ALL THE TIME and managed to amass a ridiculous amount of graphic t-shirts. He then chose to drop a ton of weight (around 40lbs) so most of his shirts no longer fit him and he had to amass a whole new crop to fit his slender new physique. Way to be wasteful, sweetie.
We ended up storing most of the shirts in a bin till we either donated or crafted the pile away. Now, the most obvious project for all these shirts is a t-shirt quilt. So, yea, that's what I did.
First things first, sort through the pile of shirts (the below picture is only a fraction of what we have too) and select shirts to try and fit into the quilt. An additional part of this step is to cover Hobbes in a pile of shirts because he's a blob and we can.

See, he loves it under there. He's like the Junk Lady from Labyrinth.

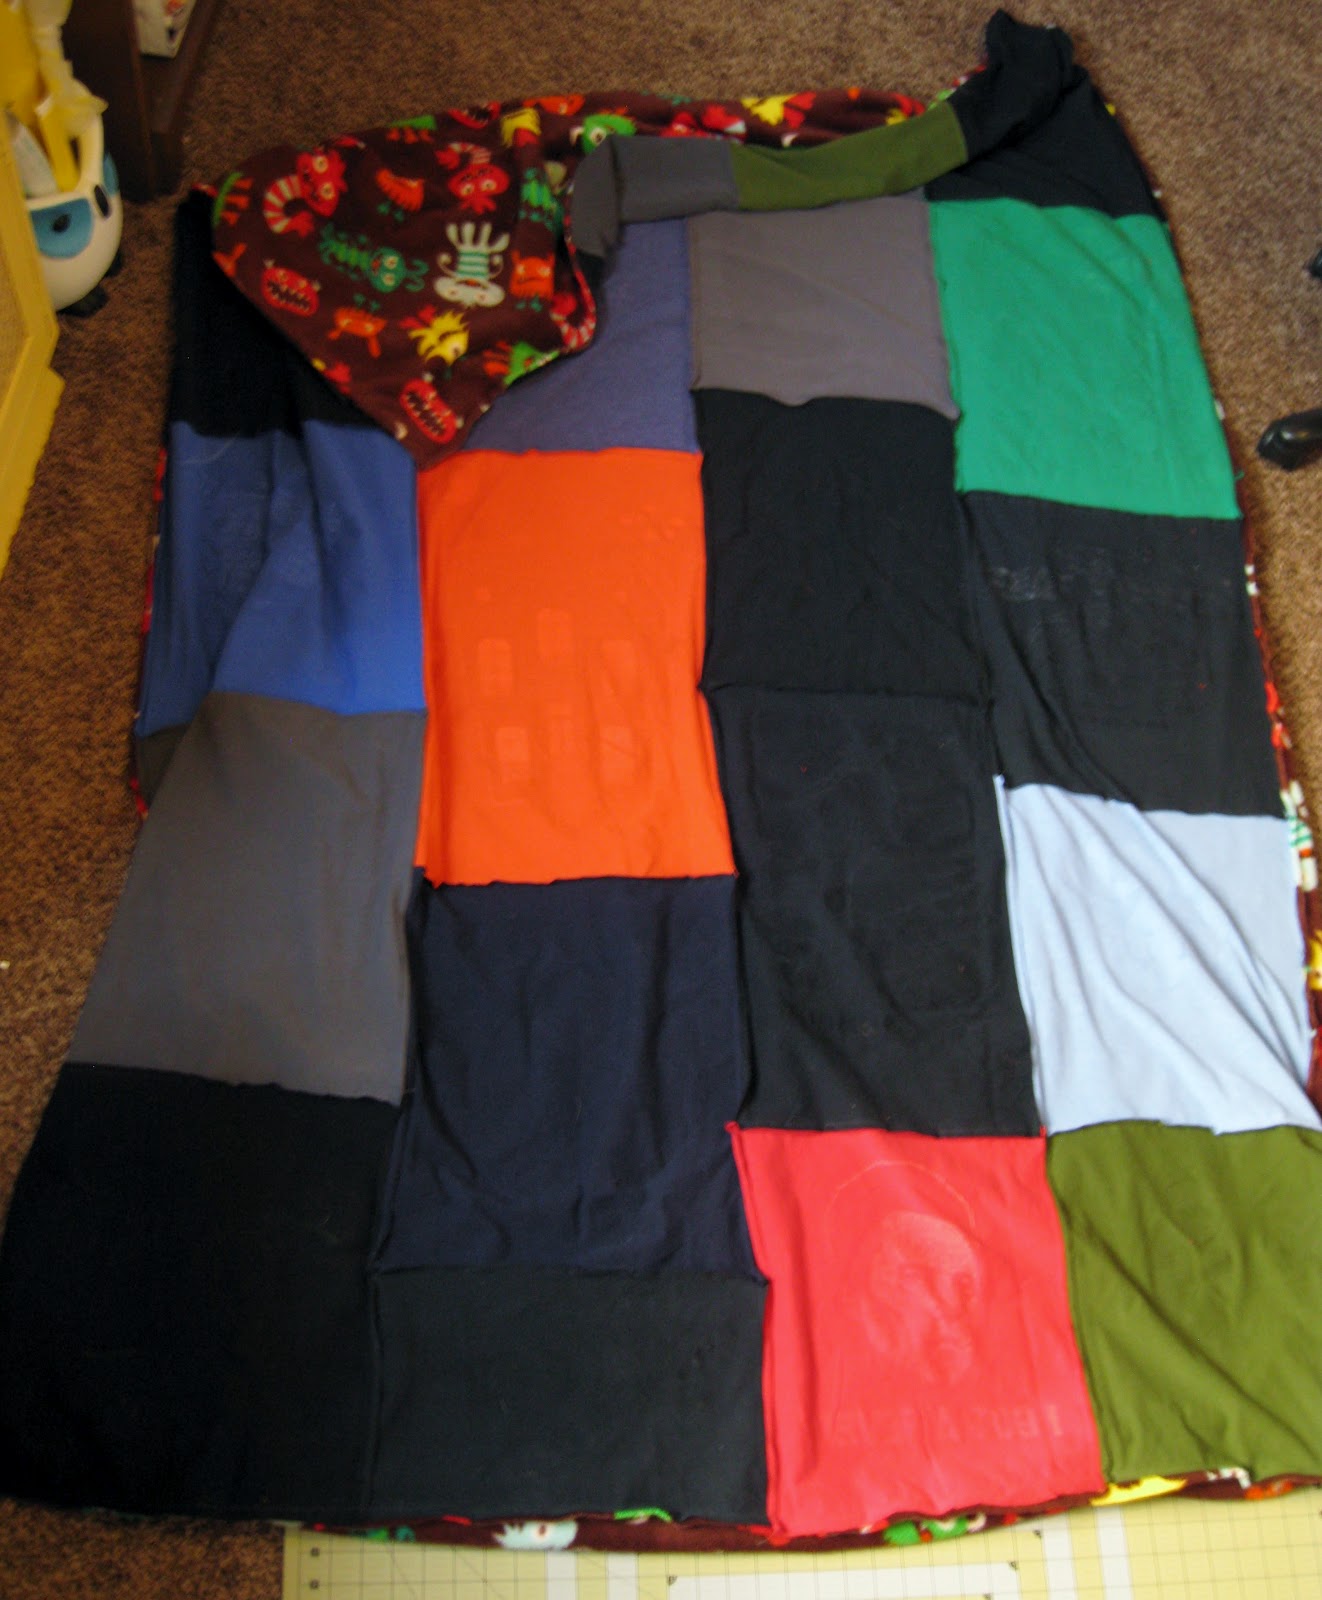
Once all the shirts had been picked out, I arranged them in a pattern that seemed to work. My main goal was to mix the shirts up enough so that none of the black or gray shirts, of which there were many, were lumped together in too big of a clump.
*Forewarning, I constructed this thing in probably the most complicated manner possible.*
Working column by column, the shirt with the widest graphic was trimmed down so there was about an inch of plain t-shirt fabric surrounding the picture. The second step was to trim the rest of the shirts in that column to the same width. Once all the columns were set, I cropped a bit off the top and bottom of each shirt so that the columns were the same length.
All in all, this process maybe took me around four episodes of Simpsons. Not a huge chunk of time but there's probably an easier way to tackle this step. What that way is, I don't know. Obviously. Or else I would have done it that way.

After all the shirts were cut down, I started sewing the columns together. Easy peasy for even a beginner, nothing but straight stitches. Pin the edges of the shirts together, graphic facing graphic, and sew together.

Repeat this step until all of the columns are assembled. Also, make sure that the shirts are not upside down when you sew them together as evidenced in the top right corner with the Halloween shirt. If this happens, use a stitch puller to separate the shirts so that they can be sewn back together in the correct positioning. Extensive muttered swearing is highly recommended during this time.

Next is to sew all of the columns together. Pin graphic side to graphic side and sew.

Now, as pictured above, some of my columns were not the same length as I had previously thought. This....was a bummer...but only a couple inches of the Phantasm shirt would be affected and you'd still see most of the creepy tall man so I didn't stress out over it too much. Also, even though my construction method was a bit haphazard, I really like the final results where the rows are staggered. Most of the other t-shit quilts I've seen were made by cutting each shirt into the exact same size and sewn together in a neat little grid so it was fun to try something a bit different.
Unfortunately for my desire to whittle down my fabric supply by avoiding purchasing new stuff whenever possible, I didn't have enough of any fabric on hand to use as the backing for the shirts so I had to buy something new. After wandering through the fabric store, this adorable and crazy soft super fleece fabric jumped out at me.

To assemble the shirts and the backing fabric, I laid the fleece on the floor, placed the shirt quilt on top, smoothed everything out, and cut the fleece so it was the same size as the quilt. Very precise sewing science in the works here.
Next, you guessed it, pin graphic to graphic and sew. However, be sure to leave a small opening between the two layers or else you'll be pretty disappointed in the end with your weird inside out blanket. Of course, if that's what you were going for, then you get to skip the next step. Hooray!
If you did not want to create a weird backwards blanket then use the small opening to pull the entire thing inside out and stitch the opening closed.
BLANKET ACTION SHOT!!!!
 |
| Thank you Silent Hill for distracting him enough for me to snap some pictures. |
Blanket action shots are not as dramatic as one might think. Unless maybe the blanket was on a tiger or something. That would be pretty dramatic. Or adorable. I'm leaning more towards adorable. Oh man, comfy tiger purr would be the best thing.