Sunday, October 27, 2013

Watch out for snakes!

Happy Halloween!  If you get inspired by this post and want to recreate this project you better hurry because Halloween is only four days away!  I say this as someone who just barely finished this project in time for its intended holiday.  It is going to look pretty awesome for these next few days though.

Pretty sure this was originally a Martha Stewart idea but then again, what isn't now a days.  Martha, you wily dame.  This Halloween wreath only requires two things, a plain stick wreath and snakes of various sizes.  If either the wreath or snakes are not black, fix this with matte black spray paint.      


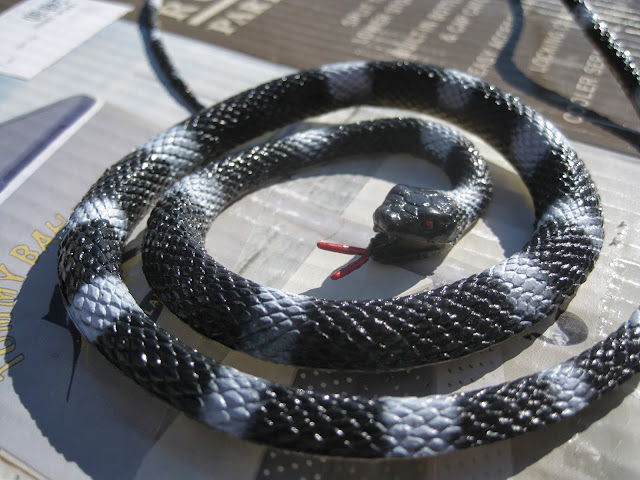
This snake close up is for my friend/nemesis Ed who hates snakes.  Though I don't think he even reads this blog.  Which makes it a lot funnier to me.  These pictures are just out in the world now, waiting to be discovered.

Hi, friend!

Pictured below is the now black wreath along with a package of already black tiny snakes that was also picked up from Dollar tree.  The large snakes are drying in the garage during this picture.


Again, this one's for you Ed.

Let's be BFFs!
Here the large snakes make their grand reappearance sans white stripes.  However, only two survived the spray painting process.  I have no idea why, since the snakes were spray painted at the same time in the exact same manner, but the paint on the third snake would not dry.  It just stayed tacky and gross.  Maybe primer would have helped.  So try that if you try this.


To add the snakes to the wreath, I wove them through the sticks that made up the wreath.  No glue required.


In this picture, you can see how the snakes are woven through the branches of the wreath to hold them in place.


AH!  Spooky snake wreath!  Taken at night to help add to the spookiness.  Or because that's when I took the picture and didn't want to wait till tomorrow since Halloween is already so close.


Close up shot of the wreath.  To hang the wreath, I used a clear 3M hook.  I was skeptical on these hooks only because the last time I used them to hang my belts up in the closet all my belts fell down.  Could be because I never waited the required hour before hanging something on them.  Directions, it turns out, are sometimes there for a reason.


Another closer up.  I hate you Ed.


So this turned out pretty cool, right?  I like the monochromatic look.  From far away, it looks like a regular black wreath.  Unassuming.  Unthreatening.  Then BAM!  Snakes all up in that door decoration.

Watch out for snakes.  

Sunday, October 6, 2013

Lego Simpsons Shadow Box

In the midst of another cleaning session of the craft room (we recently acquired a king size bed so our old queen needed some space made for it thusly turning my craft room into a craft/guest room or as I prefer to call it my craft/napping room) I whipped up a quick present for my Simpsons/Lego crazy husband.  

After digging though my closet, I found this shadow box frame.  I don't really know where I got this from....but that happens a lot with the stuff I find in my craft closet.  


As you might have deduced from the title of this post, I recreated the Simpsons family out of Legos and put it in a shadow box. The minimalist Lego Simpsons idea originally came from here.  Luckily, we have an outrageous amount of Legos hanging around the house.  Seriously, ridiculous.  The husband's mom is an avid garage saler so she snagged bins and bins of Legos for us for a song.  After a few minutes, I had put my new little Simpsons family together.     


Since the inspirational beach backing that was originally in my shadow frame would make an unarguably odd background, I opted for this fake leather like material.  I thought something neutral that still had a bit of texture to it would help make the Legos pop out a bit more.  


Once the backing of the frame was removed and poetry removed, my fabric just had to be cut to size and glued on.  Easy peasy.  


Next step was gluing the Legos to the fabric using the glue gun once again.


A few minutes later, once the glue had dried, I reassembled my shadow box and was rewarded with this cool art piece.  Well, the husband was rewarded with it technically since I made it as a present for him.  But still, super cool spur of the moment craft.


Monday, May 20, 2013

Outdoor pot makeover and then a makeover-makeover


In an effort to clean out the garage because it's a mess and we'll never be able to fit a ping-pong table in there at this point, I dragged out a few pots to utilize on the back porch.  


The current colors on the pots weren't working for me so I decided to spray paint everything so they would match.  First, the pots were sprayed slate gray with a flat finish.  Oh yea, you may have noticed that one of the pots is missing from the below picture.  After I snapped the above photo of the five pots, I discovered the small blue/white pot had a crack in it.  Shortly after this discovery, Norman knocked it over and broke it into a bunch of pieces thus ruining any hope I had of still using it despite the aforementioned crack.  So, there's my story.


Once they were good and gray, I used masking tape and newspaper to block off the top half of each pot.  Next, the lower half of the pots were sprayed neon orange with a glossy finish.


After a few hours, the newspaper and masking tape was removed and my pots looked like this.  In other words, they looked awesome.


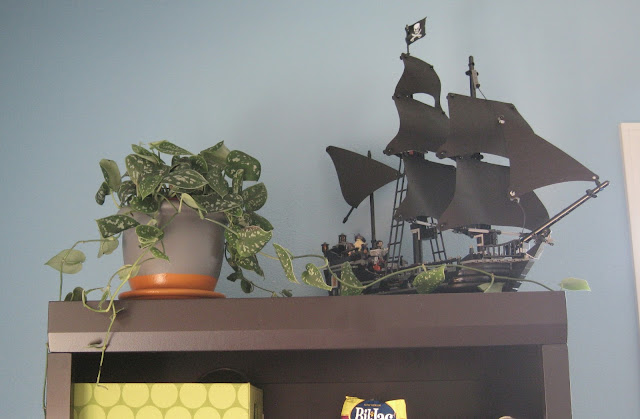
After five seconds consideration, I decided to use this guy inside the house so I could add another plant to my kitchen.  I love the pop of orange against the blue walls.  Oh, what's that?  You're wondering what's to the right of the plant?


Oh yea, it's totally a Lego pirate ship.  That's how we decorate.  


For the pots that were remaining outside, I didn't go into this project with an idea of what I would plant in these so after wandering aimlessly through a nursery, I ended up with lavender for the larger pot and lemon balm seeds that I'll attempt to grow in the two smaller pots.  I'd never heard of lemon balm before but it looks like a mint plant and the packaging informs me that the leaves will taste great in tea so I was convinced to try them out.    


Little tip, along with being pretty and smelling nice, lavender is also a natural mosquito repellent.  During the hotter months, I turn into a walking mosquito bite.  It is not pleasant.  Hopefully, having a lavender plant on the porch will help me change that a bit.  At least I'll be safe in my own backyard.  Other plants that repel mosquitos are catmint, lemon grass (also called citronella), and marigolds.         


Remember how I decided to use one of the pots in my kitchen?  It was next to a sweet Lego pirate ship.  Yea, I just wrote about it a few pictures up.  I decided the orange looked so great the entire pot should be orange.  So that's what I did. 


Any outdoor decorating going on in your neck of the woods?  The To Do list at our house just got way longer thanks to the return of the hubs and mine joint birthday BBQ coming in July.  Such as the walls pictured above will be a different color after this coming weekend.  Some gallery shelves will be built.  Planting in the front yard.  The tasks seem endless and I cannot wait!   

Friday, May 17, 2013

Do Yourself a Favor Friday: Vanilla Extract Room Freshener

Welcome to the first installment of Do Yourself a Favor Friday!  These posts will be short, sweet, and hopefully helpful.  Through my many internet searches, blog readings, and Pinterest; I come across a lot of life hacks or tips where I think, "Huh, that sounds pretty helpful" only to completely forgot about said handy tidbit moments later but NO MORE! 

The first Do Yourself a Favor is the vanilla extract room freshener.  For the most part, despite three pets, my home smells pretty good.  At least, I think it does....oh geez, does my house smell and I've just lived in it too long that I don't even notice?!  For the sake of my sanity, I'm going to say yes, my house smells pleasant.  Or at least it usually lacks a smell oh geez now I can't stop talking about how my house smells.  Stop it, Megan, stop it.

!!!!SEGUED!!!!

Occasionally, the house does need some refreshing.  The husband and I are avid home beer brewers (I'll do a post on this when our next batch of ingredients comes in) and it is a smelly business.  In every recipe, there is at least an hour where three gallons of hops and grains are at a rolling boil on the stovetop which, if you've never experienced this, smells awful.  It smells like you've made a campfire out of wheat, wet branches, and multi-grain bread.  In your house.  Yea.  It is also a smell that lingers.  Even with all the windows of the kitchen/living room open, that stence is sticking around for at least two days.   

So when I came across this pin on using vanilla extract to stink up a room real good, I had to try it out. 


According to the pin, all that needs to be done is pour two cap fulls of vanilla extract in a coffee mug, place it in a 300 degree oven for an hour.  Within twenty minutes, the whole house should smell delicious.


Friends, strangers, future strange friends.  This worked amazingly.  The scent heavens opened and beautiful angels made-out with my olfactory glands.  It smelled like someone had been baking cookies all day instead of like a wet hot beer dough dog creature came inside and shook off in the house smell that is a result of brewing beer.

If your home needs a pick-me-up, definitely try this out.  The only downside is that your house will smell like it's filled with cookies when, in reality, it may not be.  While this Do Yourself a Favor has it's upsides, there is a chance for severe cookie disapointment.

So, all in all, I guess it's kind of a wash. 

Tuesday, May 14, 2013

If you build it, he will be contained

The fella and I have been slowly been putting our backyard together since when we moved into our home, the space consisted of dirt and a few rocks.  One sprinkler system, lain sod, extended patio, and fence installation later and we are finally ready to add some greenery and life to our little plot of land. 

Jump cut to us getting a dog with a vendetta against all things plant based who seems determined to undo everything we had accomplished. 

This is our maple tree that used to have a lot more than one branch and now requires a protective barrier.
Silk tree that used to be over 4'.  It has since been nicknamed our "Stick Tree" but is now starting to come back to life.
Now, to be fair to Norman, he’s still a puppy.  Little guy hasn’t even hit the year mark yet so I repeat my pup mantra, normally with more colorful language after finding something else that he’s demolished, “He’s still young, he’s still learning.” Despite his puppydom, our yard still needs to happen so the wonderful solution of giving good ol’ Normicron his own space in the yard was visualized and brought to fruition.

Running along the side of the house is a strip of yard that is 6’4” wide and 39’ long that, once we put our fence up, created a pretty nice nook.  Since there was no gate on this side there would be zero foot traffic through this area and it's shaded most of the day making it an ideal spot for a dog run.


Transforming this nook into a dog run really only required fencing it off somehow to keep the bundle of fur contained.  Figuring out what to use for the gate took longer than the actual construction.  Plans were made for chain link fencing only to be tossed aside.  We went as far as buying a rod iron ready-made gate at Lowe’s only to return it after realizing Norman would knock it over in two seconds. After this frustrating defeat, the solution finally came to me.   

Purchase a ready-made 8’ section of picket fencing, make a few strategic cuts, add some hardware, and BAM dog run gate/fence is ready for action.


Having helped build our fence the previous summer, constructing the dog run gate/fence on my own was pretty easy.  So here we go.

Materials list
-       1 4’x8’ premade picket fence panel
-       1 gate latch
-       2 hinges
-       2 4”x4”x8’ wooden posts (cut down to 6’ in store)
-       Gravel
-       2 80 lbs bags of cement
-       3 inch wood screws 

Once my materials were gathered the first step was to dig holes for the posts.  I dug holes 2’2” deep and added two inches of gravel to provide drainage.  


Once the holes are all set, put posts in and add the mixed cement.  Once the cement is in, use a level to check that the posts are level.  Take a stake or other pointy object and jam in into the cement multiple times to eliminate air pockets and improve stability.  Recheck that the posts are still level (things shift during the cement stabbing) and make adjustments as needed.


Once the post were in place, I starting cutting down and reassembling my cedar fence panel to turn into the gate and fencing.  It should be noted, while the gate and fencing were built the same day the posts went in the ground, I waited a full two days before attaching anything to the posts so the cement could fully cure.

Creating the gate/fence required a lot of calculations in the sense that I held the uncut fence panel up in the gap and guessed where everything should be cut.  In order to turn the fence panel into a fence with a gate, four cuts needed to be made.  I needed one section to attach to the left post.  A second section to turn into the gate door.  The third section would attach to the right post and have the gate hinges on it.  The fourth cut would also be made on the third section to cut it to size.  This leftover bit would be trashed.

Also, the cutting portion of this project royally sucked because our buzz saw was broken which meant everything had to be cut by hand.   

First came the gate.  The section on the left is the bit that will be attached to the left post.  The larger section will become the gate door.


Gates require a support beam so I had to figure out how to build one.  Using a technique that any engineer would be proud of, I laid a scrap 2x4 across the gate and drew lines where the cuts needed to happen.


Since hand sawing was required, I didn't trust myself to cut straight lines so I enlisted the help of this kerjigger that I found in the garage.  Line up wood, slide the saw through the metal horseshoe shaped bit, and start cutting.  


Rejoice in the fact that the support beam fits!


Attach support beam to gate using 3" wood screws and glue.


Now that the gate door was done, I could add the latch and hinges.  This was the easiest part of the whole project (or so I thought) since it only required lining things up, drilling a few pilot holes, and then adding screws.  Done and done.  


Once the hardware was attached and cement fully cured, I got down to the business of defeating the Huns.  Oh wait, that was Mulan.  This is what happens when I watch Disney movies while writing.  Anyways,  using 3" wood screws again, I attached the fence panels to the posts.  Boom!  Dog containment time.


Now, some of my more observant readers may have noticed the substantial mistake I made while attaching the gate latch.  I put it on in such a way that the gate could not actually open.  Kind of a problem unless I want to heave my dog over the fence in order to get him in the dog run.  


Luckily for my sanity, this was an easy fix.  I removed the screws, repositioned the latch in the correct manner, and reattached.  Did the whole thing while it was still hanging up and took all of two minutes.


Now that the gate was functional, a few perks were added to the area so Norm could lounge in style.  Threw down some pea gravel for a ground cover, bought him a dog house (that he has yet to go in ungrateful beast) and purchased two LED solar post lights to add a bit of fancy.   


And I dub thee Dog Run.  There's a few more things I have planned for this space but overall, I'm pretty happy with how this looks.  Norm is also a fan because now he's not cooped up inside all day and our plants can breath easy knowing they're safe with him outside.  Also, an extra bonus for Norm, now he has a place to bury all the bones/chew treats that we give him instead of actually chewing them.  Dogs are weird.    

UPDATE: Norman still hasn't used that dog house. Not even once. What a fucking jerk. It's up on Craigslist right now. $80. A lot less than the original price. $5 more than I paid for Norm. He's lucky I love him so much. 
Wednesday, May 8, 2013

How I saved a thrift store mirror...from myself...

This is the story of me saving a mirror.  Albeit, I saved the damn thing from myself and the terrible things I was doing to it in an effort to make it less ugly.  So, let’s rewind to the beginning when I found a mirror with a jacked-up surface (scratches and old paint) but with a great hexagon frame so for only $7 this guy and I became fast friends. 

Yes, the mirror came to my home where it sat around and did nothing except take up space like an unwanted house guest.  Each time I went into the room it was stashed in, awkward small talk occurred and I just kept wondering when this mirror was going to get off my floor and go find a job.  Upon remembering that inanimate objects do not often obtain their own occupations, I gracefully decided to give the little guy some extra help.

Which went terribly wrong.


My original intentions started off so well.  I was inspired by the chalkboard pegboard in our garage where, during my husband’s 30th Birthday BBQ, several friends wrote and doodled on the board.  For months, the drawings stayed and gave me a happy memory to smile at each time I went into the garage.  Hoping to create a more accessible surface to mark up during parties, I had the idea of adding a framed chalkboard to our guest bathroom.  I had imagined a beautiful deep purple frame with an oil rubbed bronze accent against the black of the chalkboard paint.  In my mind, it looked amazing.     


My plan seemed easy enough.  Paint the frame a better color, put chalkboard paint on the glass, hang in bathroom, and allow for fun i.e. inappropriate drawings to occur.  The frame surface was sanded, primer was added, and then this happened. 


Did I not sand enough?  Not enough primer?  Just a terrible color in the first place?  The answer to all these questions was yes.  Upon this devastating defeat, the mirror was shoved into a corner to be forgotten about temporarily until one magical word came to mind. 

Rope.

If I couldn’t paint the mirror frame (or simply couldn’t bring myself to attempt to paint the frame again because a second defeat would send me down a craft shame spiral), I would find a way to cover it up.  I had originally come across the rope idea on Pinterest, of course.  Although, the inspiration picture and the my final result ended up quite different.

My original plan with this pin was to make what the pin showed.  My bathroom has an octopus/nautical theme so the idea of rope storage accessories seemed like a smart move.  Nautical means ships and ships have rope on them.  Makes perfect sense.   Plus, everything in a bathroom is usually so sleek and smooth so adding the rough, natural texture of the rope seemed like a great way to add a layer to the room.  


After the original chalkboard mirror plan went kaput, I took a few moments to curse my frustrations away and then remembered the above pin.  Realizing that rope solved the problem of my crap paint job amazingly well by simply covering it up made me do a little jig that may or may not have looked glaringly similar to Elaine's "little kicks" dancing.  This also lined up beautifully with Young House Love's quarterly Pinterest Challenge where this adorable couple encourages everyone to stop pinning and actually create something.  A very common ailment of Pinterest is all pins and no action so I was only too happy to join in this challenge!     


On round two with the mirror, I started with the chalkboard section of the project first.  To prep the glass, I roughed up the surface with coarse sandpaper; sprayed it with two layers of primer, and finally painted on two coats of chalkboard paint.  

BAM!  Done.


I didn’t worry too much about getting the chalkboard paint on the frame because, as mentioned previously, the name of game is cover-up.  So, using a glue gun and a $5 ball of rope, I slowly worked my way around the frame placing blobs of glue every couple inches while wrapping the rope around the frame.  A few minutes in and my little friend started looking something like this.  Or exactly like this.  Because that’s how pictures work.  

About halfway through this project, just as I was getting into my glue gun groove, I ran out of glue sticks....  

Such a crafting tragedy.  A tragedy that was quickly remedied two days later when I procured more glue sticks.  One burned finger later and I end up with this. 


Unluckily, this mirror had no hanging apparatus when I purchased it so I can only assume it stayed on someone else’s wall through magic.  Seeing as how I never received my letter to Hogwart’s, I was forced to purchase these picture hangers and nail them to the back of the mirror.

Attaching these things is super easy.  Just figure out the placement and hammer the tiny nails (included in package) into the frame.  The only real hazard is if you have large fingers, you're going to smash them with the hammer.  Can't be avoided.  Sorry.


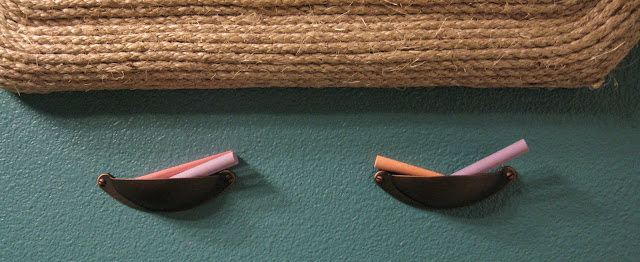
The next step in this project was to answer the question, "Where will the chalk go?"  One good wander around Lowe's and the answer presented itself.  I picked up two drawer pulls and decided to flip them upside down so they'd essentially turn into a little storage space.

Only one small snag occurred when I got these home and realized that, yea, they're drawer pulls so obviously the hardware for them would go through the drawer and I had no way of attaching these to a wall.

One brilliant MacGyver thought later (hammer nails into the wall, add a dollop of glue, and slip the drawer pull onto the nails) and my chalk storage was ready to go! 

Here is the before picture of my bathroom.  I apologize in advance for these shots.  This bathroom gets ZERO natural light and is narrow like most bathrooms so snapping a decent picture proved irritatingly prickly.  I digress, this is what the bathroom looked like before hanging the chalkboard mirror.  


Here's is what it looked like after the fabulous addition of the chalkboard mirror.

Here's a not mirror reflection shot.  I love how the frame fills up the normally untouched blank space behind the door.


Close up of drawer pulls/chalkboard hangers.


I cannot wait until our next party!  I envision taking pictures of the chalkboard at the end of every shindig and making a coffee table book so when we’re old and wrinkly and gross, the husband and I can look back and remember that at one point in our lives, we threw some kick-ass parties.

**Update**

The husband texted this photo to me this morning so he's obviously already enjoying the new addition.